Categories
- Curriculum: Art
- Age/Grade: Elementary 2 | Elementary 3 | Middle School
- Subject: Drawing | Painting
- Materials: Pencils | Paint
- Institution: Rosedell Elementary School
- Location: Santa Clarita, California
- Duration: 2 Classes
Description
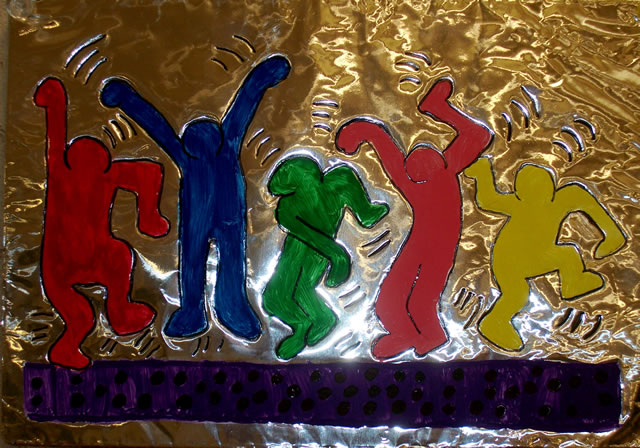
A fun project where kids paint Haring figures on aluminum foil.
Materials
Tag board or Cardboard
Heavy Duty Aluminum Foil
White Copy Paper (Blank or With Copies of Haring Images)
Pens and Pencils
Tape
Tempera Paints and Paint Brushes
Permanent Black Magic Markers
Procedure
Step One:
Cut tag board/cardboard to desired size. Tear and place enough of the shiny side of the aluminum foil, so it fully covers one side of the tag board and folds over to the back. Keep the foil flat, unless you are looking for a textured painting surface. Place tape on the back to secure foil.
Step Two:
For young kids, I draw simple Keith Haring designs on copy paper, make copies, and then let the boys or girls choose the one they want to work on. I encourage older boys and girls to create individual Keith Haring designs on white copy paper using pens. Cut paper so a portion of it folds over the tag board.
Step Three:
Place copy or drawing on top of the foil that is attached to the tag board. Fold the paper over and place a bit of tape on the back to keep it from shifting, or carefully hold the paper in place.
Step Four:
Trace the drawing with a dull pencil pressing down hard enough to etch the drawing into the foil. Remind the boys and girls to not lift up the paper, as it is almost impossible to place it back exactly where it was originally. (We did come up with some interesting double traced designs, though.)
Step Five:
Remove the paper and using tempera and a brush, have kids paint drawings using bright colors. Apply a fairly heavy application and then add a second or third coat as the paint dries. Adding a bit of liquid soap, may also help the paint stick better.
Step Six:
Have students outline their pictures and add details with the permanent markers. Be careful not to rub paint off with markers. Mount on construction paper.
Images
